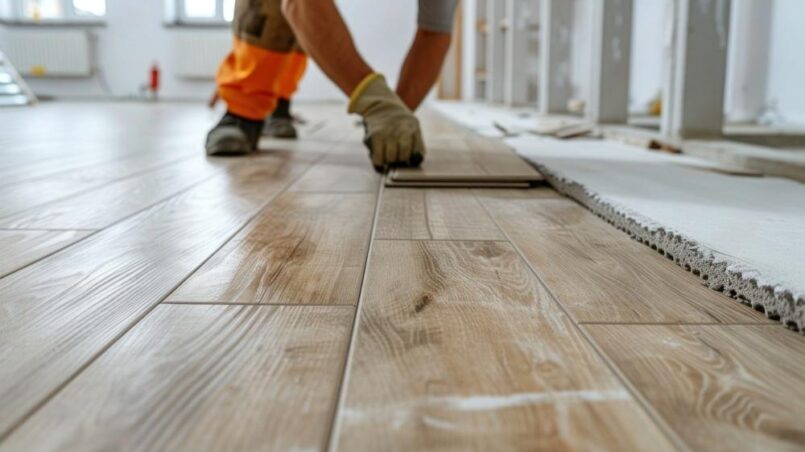
Laminate flooring has become a popular choice for homeowners seeking a cost-effective, durable, and stylish flooring solution. It mimics the look of hardwood, tile, or stone at a fraction of the cost, making it an ideal option for budget-conscious consumers. In this guide, we will walk you through everything you need to know about laminate floor installation, from selecting the right materials to completing the installation process.
Key Takeaways
- Cost-Effective Solution: Laminate flooring offers a budget-friendly alternative to hardwood and tile without compromising on style or durability.
- Easy Installation: With a click-lock system, laminate flooring is easy to install, making it suitable for DIY enthusiasts.
- Durability and Maintenance: It is resistant to stains, scratches, and wear, requiring minimal maintenance.
- Versatile Designs: Available in various textures and patterns, laminate flooring can mimic hardwood, stone, or tile.
- Eco-Friendly Option: Many laminate products are made from recycled materials, making them an environmentally conscious choice.
Why Choose Laminate Flooring?
Laminate flooring offers a wide range of benefits, making it an appealing option for residential and commercial spaces. It is easy to maintain, resistant to stains and scratches, and available in a variety of designs and textures. Additionally, laminate flooring is relatively simple to install, especially with the popular click-lock system that eliminates the need for adhesives or nails.
Cost-Effective Flooring Solution
One of the biggest advantages of laminate flooring is its affordability. Compared to hardwood or tile, laminate is significantly cheaper while still providing a similar aesthetic. The cost savings extend beyond the materials, as laminate flooring is also easier and quicker to install, reducing labor expenses.
Selecting the Right Laminate Flooring
Choosing the right laminate flooring involves considering several factors, including:
- Thickness and Durability: Thicker laminate provides better sound insulation and comfort underfoot. It also tends to be more durable. Look for products with an AC (Abrasion Criteria) rating that indicates resistance to wear and tear.
- Design and Texture: Laminate flooring comes in a wide range of designs, including wood grain, stone, and tile patterns. Opt for textures that enhance the realistic appearance of the flooring.
- Water Resistance: If you plan to install laminate flooring in moisture-prone areas such as kitchens or bathrooms, select a water-resistant option to prevent warping and damage.
Tools and Materials Needed for Installation
To ensure a smooth installation process, gather the necessary tools and materials in advance:
- Laminate flooring planks
- Underlayment for cushioning and moisture protection
- Spacers to maintain expansion gaps
- Measuring tape and pencil for precise measurements
- Saw (circular or jigsaw) for cutting planks
- Rubber mallet and tapping block for securing planks
- Pull bar for tight-fitting end pieces
Preparing for Laminate Floor Installation
Proper preparation is key to a successful laminate floor installation. Begin by acclimating the laminate planks in the room where they will be installed for at least 48 hours. This helps them adjust to the temperature and humidity levels, preventing expansion or contraction after installation.
Next, ensure the subfloor is clean, dry, and level. Any debris or unevenness can cause issues with the laminate planks. If necessary, use a leveling compound to correct uneven areas.
Installing the Underlayment
Underlayment is crucial for providing cushioning, sound insulation, and moisture protection. Roll out the underlayment, ensuring there are no overlaps or gaps. Use adhesive tape to secure the seams. For moisture-prone areas, consider a vapor barrier for additional protection.
Step-by-Step Laminate Floor Installation
- Plan the Layout: Start by determining the direction in which the planks will be laid. It is generally recommended to run the planks parallel to the longest wall or in the direction of natural light for a visually appealing look.
- Begin Installation: Begin in one corner of the room, placing spacers along the wall to maintain an expansion gap. Lay the first row of planks, clicking them together end to end.
- Continue Row by Row: Stagger the joints for a more natural look and added stability. Use a saw to cut planks to the appropriate length as needed.
- Secure the Planks: Use a tapping block and rubber mallet to ensure a snug fit between the planks. A pull bar is useful for fitting end pieces tightly.
- Finish the Installation: Once all rows are in place, remove the spacers and install baseboards or molding to cover the expansion gaps.
Common Installation Mistakes to Avoid
- Skipping Acclimation: Failing to acclimate the planks can lead to warping or buckling after installation.
- Improper Subfloor Preparation: An uneven subfloor can cause the planks to shift or separate.
- Incorrect Expansion Gaps: Ensure consistent gaps around the perimeter to allow for natural expansion and contraction.
- Misalignment: Carefully align each row to prevent visible seams or gaps.
Maintenance and Care for Laminate Flooring
Maintaining laminate flooring is relatively simple:
- Regular Cleaning: Sweep or vacuum to remove dust and debris. Use a damp (not wet) mop for deeper cleaning.
- Avoid Excess Water: Laminate flooring is water-resistant, not waterproof. Avoid soaking the surface to prevent damage.
- Use Protective Pads: Place felt pads under furniture legs to prevent scratches.
- Prompt Spill Cleanup: Clean spills immediately to avoid staining or moisture damage.
Environmental Impact and Sustainability
Laminate flooring is an eco-friendly choice as many manufacturers use recycled materials in production. Additionally, its durability reduces the need for frequent replacements, minimizing waste. Opting for products certified by environmental standards ensures responsible sourcing and manufacturing practices.
Enhancing Home Value with Laminate Flooring
Installing laminate flooring not only enhances the aesthetic appeal of a home but also increases its market value. Its durability and easy maintenance are attractive to potential buyers, making it a wise investment for homeowners looking to sell in the future.
DIY vs. Professional Installation
While laminate flooring is designed for easy DIY installation, some homeowners prefer to hire professionals for a flawless finish. Professional installation ensures precision in cutting and fitting, especially in complex areas like corners and doorways. If you are confident in your DIY skills, installing laminate flooring yourself can save on labor costs.
Laminate floor installation is a cost-effective and stylish way to enhance your home. By choosing the right materials, preparing the subfloor correctly, and following the installation steps meticulously, you can achieve a professional-looking finish. Whether you opt for DIY or professional installation, laminate flooring is an excellent investment that adds value and beauty to any space.
Can laminate flooring be installed in bathrooms or kitchens?
Yes, laminate flooring can be installed in moisture-prone areas like bathrooms and kitchens, but it is essential to select water-resistant laminate. Proper installation with a moisture barrier and sealing edges can enhance durability and prevent warping.
How long does laminate flooring last?
With proper care and maintenance, laminate flooring can last between 15 to 25 years. The lifespan depends on the product’s quality, thickness, and resistance to wear. High-traffic areas may require more frequent replacement compared to low-traffic rooms.
Can laminate flooring be installed in bathrooms or kitchens?
Laminate flooring is pet-friendly as it is resistant to scratches and stains. Its easy-to-clean surface makes it ideal for homes with pets. However, selecting a textured finish can provide better traction for pets, preventing slips and falls.


